Not being crafty that's for sure. I have made a few more mock ups of training pants but don't like what the results turn out to be. I am doing some light smocking this evening but having a hard time staying focused.
I need inspiration, but I don't need another project to add to the stash. Sigh.
Showing posts with label sewing. Show all posts
Showing posts with label sewing. Show all posts
19 August 2010

27 June 2010
Playdate Bag is done!
MacMac took Squeekmoo out for a few hours this afternoon and I was able to making and sew the lining for the Play date bag. I'm going to have to change its name to Trip to Grandma or something like that because the bag is HUGE!
Here the completed pictures though:


Here the completed pictures though:

Front

Back

Inside Out Front

Inside Out Back

A peek from above
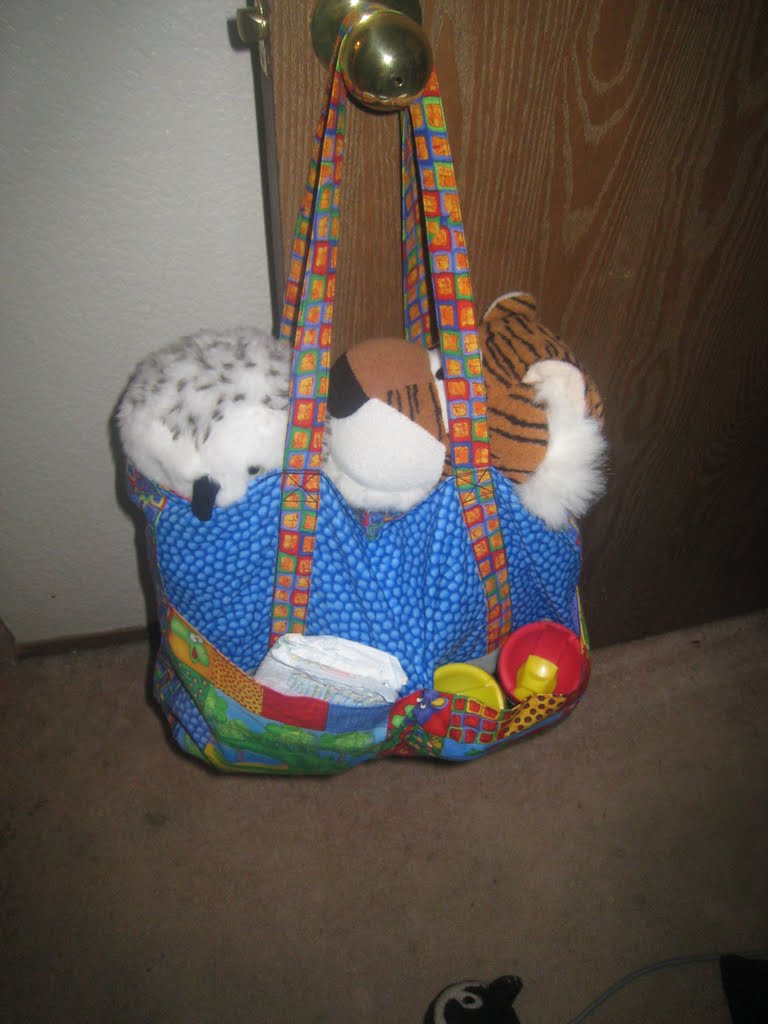
Fully loaded: Two sippy cups, diapers and wipes in the front pockets. Board books and Geotrax trains in the back pockets. Change of clothes, Hobbes the Tiger and Who the Owl in the main compartment.
22 June 2010
What's on the Project table this week
I'm in the middle of so many projects! Thankfully all of them are destine to be complete... I hope.
Doll for SqueekMoo. I started version one back in December. I made the doll and stuffed it, however the attempt to give her wig hair failed. So she was put on hold for some time. Recently Squeekmoo showed some interest in yarn hair as a substitute for mommy hair, so I quickly gave the version on yarn hair. Well MacMac has called it Cher one to many times and so I'm working on version two. Version on was a well endowed historical-ish cloth doll to dress up in historical garb. Version two is actually meant for to be a child's play thing. At this time I'm currently in the middle of stuffing her. After that its sew her head on, give her hair, and give her clothes and hopefully SqueekMoo will dote on her hair instead of mine at bed time.
Play Date Bag. Have to cut out lining and sew it all together. I have decided a little velco will be in order. I'm continplating velco and a zipper for the next version but we shall see.
Stillborn gown. I guess I get in the mood to make these during certain holidays. In these case Father's Day just went by and we reflected on Matthew in our personal ways. Anyways it got me in the mood to work on them. Reminded me I need to do more prep work so that when the mood strikes I don't have to waste time getting to the good part. I had to undo all the stitches of the last one I made, but I only have row to stitch of the current one. I hope to get a couple done this month.
I'm also going to start a photo word book for SqueekMoo. Basically get some pictures of some words he knows, and words we hope he'll learn. Write the words in nice capital letters and stick the pictures in a photo album. If these works I'll probably make him a Photo Alphabet book as well. Key thing I'm hoping out of the first photo book is we are going to visit form relatives and I think it would be wonderful if SqueekMoo could already identify them.
And that's what's on the project table...
Doll for SqueekMoo. I started version one back in December. I made the doll and stuffed it, however the attempt to give her wig hair failed. So she was put on hold for some time. Recently Squeekmoo showed some interest in yarn hair as a substitute for mommy hair, so I quickly gave the version on yarn hair. Well MacMac has called it Cher one to many times and so I'm working on version two. Version on was a well endowed historical-ish cloth doll to dress up in historical garb. Version two is actually meant for to be a child's play thing. At this time I'm currently in the middle of stuffing her. After that its sew her head on, give her hair, and give her clothes and hopefully SqueekMoo will dote on her hair instead of mine at bed time.
Play Date Bag. Have to cut out lining and sew it all together. I have decided a little velco will be in order. I'm continplating velco and a zipper for the next version but we shall see.
Stillborn gown. I guess I get in the mood to make these during certain holidays. In these case Father's Day just went by and we reflected on Matthew in our personal ways. Anyways it got me in the mood to work on them. Reminded me I need to do more prep work so that when the mood strikes I don't have to waste time getting to the good part. I had to undo all the stitches of the last one I made, but I only have row to stitch of the current one. I hope to get a couple done this month.
I'm also going to start a photo word book for SqueekMoo. Basically get some pictures of some words he knows, and words we hope he'll learn. Write the words in nice capital letters and stick the pictures in a photo album. If these works I'll probably make him a Photo Alphabet book as well. Key thing I'm hoping out of the first photo book is we are going to visit form relatives and I think it would be wonderful if SqueekMoo could already identify them.
And that's what's on the project table...
17 June 2010
Outer Shell Done
please forgive any typos, Mr T has decided to fall sleep on my lap after I started typing on the laptop. My left hand is free but my right arm is trapped under his forehead.
As the previous post I was able to make some head way with the bag again once I recalled how to tame slippery fabric. I'll not be able to work on the lining sine I haven't any paper big enough to cut the nylon pieces.
Here are the lovely peices I cut from my tutorial. Along with the pocket I finished earlier, the handles (those were a pain, I'll have to remember to do them my preferred way instead of the economical), and the peice the nylon will be sewn to:

Sew the handles to the blue fabric. French seam the flue to the nylon.

Baste the outside pocket in place and sew a center seam and hold it up so you can peek inside the very gererous pockets

Sew the side/bottom pieces with french seams

And vola your done.

So that turned out bigger than I thought it would be. The handles can hang off a standard free with purchase umbrella stroller Would not recommend hanging a fully loaded version of the Play Date bag off a stroller like this. Can probably get two sippy cups into one of the pockets, wipes and diapers into another. The leaves two more pockets plus the main compartment for toys. Not Bad.
As the previous post I was able to make some head way with the bag again once I recalled how to tame slippery fabric. I'll not be able to work on the lining sine I haven't any paper big enough to cut the nylon pieces.
Here are the lovely peices I cut from my tutorial. Along with the pocket I finished earlier, the handles (those were a pain, I'll have to remember to do them my preferred way instead of the economical), and the peice the nylon will be sewn to:

Sew the handles to the blue fabric. French seam the flue to the nylon.

Baste the outside pocket in place and sew a center seam and hold it up so you can peek inside the very gererous pockets

Sew the side/bottom pieces with french seams

And vola your done.

So that turned out bigger than I thought it would be. The handles can hang off a standard free with purchase umbrella stroller Would not recommend hanging a fully loaded version of the Play Date bag off a stroller like this. Can probably get two sippy cups into one of the pockets, wipes and diapers into another. The leaves two more pockets plus the main compartment for toys. Not Bad.
How to not go crazy sewing nylon.
I figured out a way to combat the slipperiness of nylon. I think this method will also work with other slippery fabrics like satin and chiffon.
You will need your pattern, your slippery fabric, paper to go under your fabric and paper to go over your fabric.
Ideally I would have preferred to have craft paper or newspaper paper with no ink on it, but I used what I had on hand. I'll probably go to IKEA this weekend and get the paper for the child easel.
For now you can see my example of using yesterday's junk mail.
First trace your pattern on to the peice of paper that will go on top of the slippery fabric:

Next place the bottom paper down and then put the slippery paper on top of it:
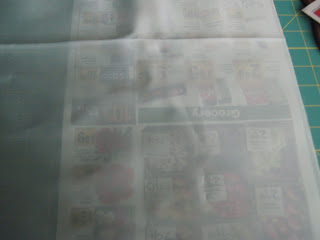
Then place the piece of paper with the pattern marked out on top. Put something of weight on top to prevent any sliping around and pin the three layers together.

If it's a forgivable fabric like silk chiffon pin anywhere and everywhere. If' it's not forgivable like the nylon is pin only in the seam allowance.
The scissors in the picture are my "I don' care scissors." I cut fabric, paper, sometime tape. Scissors have feet in this house so i'm lucky to know where any are. My good fabric scissors have a happy home, but they are five years old and could use a sharpening. I like the scissors from IKEA and during back to school season you can get some for cheap.
I wont guarantee this method is 100 percent fool proof, bu it will prevent that the pattern you cut out of the material to be closer inn size/shape then if you didn't use the paper. With just the pattern and fabric it slips every which way distorting the finished piece. Good luck!
You will need your pattern, your slippery fabric, paper to go under your fabric and paper to go over your fabric.
Ideally I would have preferred to have craft paper or newspaper paper with no ink on it, but I used what I had on hand. I'll probably go to IKEA this weekend and get the paper for the child easel.
For now you can see my example of using yesterday's junk mail.
First trace your pattern on to the peice of paper that will go on top of the slippery fabric:

Next place the bottom paper down and then put the slippery paper on top of it:

Then place the piece of paper with the pattern marked out on top. Put something of weight on top to prevent any sliping around and pin the three layers together.

If it's a forgivable fabric like silk chiffon pin anywhere and everywhere. If' it's not forgivable like the nylon is pin only in the seam allowance.
The scissors in the picture are my "I don' care scissors." I cut fabric, paper, sometime tape. Scissors have feet in this house so i'm lucky to know where any are. My good fabric scissors have a happy home, but they are five years old and could use a sharpening. I like the scissors from IKEA and during back to school season you can get some for cheap.
I wont guarantee this method is 100 percent fool proof, bu it will prevent that the pattern you cut out of the material to be closer inn size/shape then if you didn't use the paper. With just the pattern and fabric it slips every which way distorting the finished piece. Good luck!
18 May 2010
Sensibility.com relaunch plus a SALE!
Sensibility has relaunched their site and its gorgeous! I've been musing over what my fall project would be and one of the contenders is to make an ensemble based on an 1798 outfit in Nancy Bradfield's Costume in Detail .
.
I've been eyeing the Elegant Lady's Closet. I'll need to check in storage to see if I have the undergarment pattern. I can't remember. I either have the Regency Gown pattern or the Undergarment pattern.
And did you see they're going to soon have a Georgian pattern? Can't wait to see what the ladies version looks like.
So as part of their relaunch they are having a 15% off sale! How lovely!
. I've been eyeing the Elegant Lady's Closet. I'll need to check in storage to see if I have the undergarment pattern. I can't remember. I either have the Regency Gown pattern or the Undergarment pattern.
And did you see they're going to soon have a Georgian pattern? Can't wait to see what the ladies version looks like.
So as part of their relaunch they are having a 15% off sale! How lovely!
08 May 2010
Adventures in starch
The iPad holder got mailed out yesterday. Dad should get it within a week.
I started work on my May Project yesterday. Three renditions of basically the same thing. What's changing is the fabric used. In theory they should be the same thing, but three different shops going by three different names does actually give for fabric with three different feels. I'll see which I think sews best and subject MacMac's colleagues to a feel test? not sure on that part yet.
I finally got all three fabrics in. The last one came yesterday. Last week I washed the first two fabrics to get the starch/stabilizers out. I also washed the trim. Yesterday I went out in search to liquid starch. yes yes I know I just washed it out of the fabric, and now U'm adding it back it. It's so I know what kind of starch is in my fabric. Also because I wanted to pre-wash the fabric in hopes it would shrink all that it will shrink.
My adventures in finding liquid starch was not sucessful. I was hoping to find Sta-Flo but couldn't find it at Target, Alberstons or Save Right. Having gone to all three SqueekMoo was not in the mood to be out and about so home we went.
I ended up making a corn starch mixture instead. 1/2 cup corn starch and 1 cup cold water. Then add hot/boiling water. 2 quarts for a heavy mix, 6 for a light mix.
I did put it into a spray bottle, but quickly decided that dunking was the way to go. I took my first test fabric and cut it to slightly bigger than the pattern piece and into the start it went. I then wrung out the excess and hung it to dry for an hour or so.
I then ironed it. At first I couldn't tell a difference, but once I finished ironing and it was completely dry I could really tell a difference. Good think I did a very diluted light mix because it was rather stiff.
I then worked on the Swiss beading. No starch on this trim. I cut away the excess fabric on either side of the trim. Pined the trim in place and sewed it down. I then marked where I wanted my embroidery to go.
I had a little left over starch mixture and I decided that I'm going to experiment with my embroidery floss. Its just plain old white DMC floss, but pencil marks and it don't really get along too well. So I cut twenty inch lengths of floss and dunked it into the starch and ironed it. You can tell a difference in the feel. I'm hoping that by doing this the dowdy gray the floss picks up from the pencil will wash out.
I'm hoping to start the hand embroidery today. however the hoops/frames I have aren't long enough. I can probably go ahead and use the ones I have for now and stitch what I can, but I'll have to wait for a bigger hoop since placing a hoop on beading doesn't work.
I started work on my May Project yesterday. Three renditions of basically the same thing. What's changing is the fabric used. In theory they should be the same thing, but three different shops going by three different names does actually give for fabric with three different feels. I'll see which I think sews best and subject MacMac's colleagues to a feel test? not sure on that part yet.
I finally got all three fabrics in. The last one came yesterday. Last week I washed the first two fabrics to get the starch/stabilizers out. I also washed the trim. Yesterday I went out in search to liquid starch. yes yes I know I just washed it out of the fabric, and now U'm adding it back it. It's so I know what kind of starch is in my fabric. Also because I wanted to pre-wash the fabric in hopes it would shrink all that it will shrink.
My adventures in finding liquid starch was not sucessful. I was hoping to find Sta-Flo but couldn't find it at Target, Alberstons or Save Right. Having gone to all three SqueekMoo was not in the mood to be out and about so home we went.
I ended up making a corn starch mixture instead. 1/2 cup corn starch and 1 cup cold water. Then add hot/boiling water. 2 quarts for a heavy mix, 6 for a light mix.
I did put it into a spray bottle, but quickly decided that dunking was the way to go. I took my first test fabric and cut it to slightly bigger than the pattern piece and into the start it went. I then wrung out the excess and hung it to dry for an hour or so.
I then ironed it. At first I couldn't tell a difference, but once I finished ironing and it was completely dry I could really tell a difference. Good think I did a very diluted light mix because it was rather stiff.
I then worked on the Swiss beading. No starch on this trim. I cut away the excess fabric on either side of the trim. Pined the trim in place and sewed it down. I then marked where I wanted my embroidery to go.
I had a little left over starch mixture and I decided that I'm going to experiment with my embroidery floss. Its just plain old white DMC floss, but pencil marks and it don't really get along too well. So I cut twenty inch lengths of floss and dunked it into the starch and ironed it. You can tell a difference in the feel. I'm hoping that by doing this the dowdy gray the floss picks up from the pencil will wash out.
I'm hoping to start the hand embroidery today. however the hoops/frames I have aren't long enough. I can probably go ahead and use the ones I have for now and stitch what I can, but I'll have to wait for a bigger hoop since placing a hoop on beading doesn't work.
06 May 2010
One step back and two steps forward
I'm not sure how it happened but the top piece of my iPad pocket and the bottom piece ended up not being the same width. I decided to re-cut the bottom piece since its far less complicated than than the top piece.
Trial and error kicked in when I was sewing in the label. I tried making a label using some transfer paper I had on hand. Took me a while to figure out how to mirror the text only to find out when I set the printer to transfer paper it automatically flips the text. Oh the time I could have saved it I had known that. Luckily I only printed a small test so the sheet wasn't wasted.
I highly recommend if you do go the transfer sheet method and are first starting out do print in small sections so that you don't waste an entire sheet. Its economical if done right, however its mistakes care rather costly.
Second thing I encounter was I do not like the texture the transfer paper leaves. I had lovely double satin ribbon and the laminated feeling is not a happy one.
Third issue was when i went to put in my label I realized not only did it need to be printed mirrored but also needed to be upside down. It's a small cosmetic glitch not big enough for me to go and print another label. the label points in what I'd consider the wrong direction. Being that you can still see and read it when the pocket is face up its close enough for me.
Cutting the iron on adhesive went smoothly. I used heat and bond ultra. Took a little bit to figure out how much to cut out of the middle, but I think I guesstimated right. I took apart a diaper box to make myself a iPad text dummy to make sure the fit would be snug but not tedious. Ironing went well. I highly recommend using a pressing sheet. Don't think the vinyl likes heat too much.

The adhesive should be strong enough to last awhile without fear of it coming off. However he's planing on a road trip up here this summer so I'll sew it down at that point. But I honestly think it should adhere just fine.
Trial and error kicked in when I was sewing in the label. I tried making a label using some transfer paper I had on hand. Took me a while to figure out how to mirror the text only to find out when I set the printer to transfer paper it automatically flips the text. Oh the time I could have saved it I had known that. Luckily I only printed a small test so the sheet wasn't wasted.
I highly recommend if you do go the transfer sheet method and are first starting out do print in small sections so that you don't waste an entire sheet. Its economical if done right, however its mistakes care rather costly.
Second thing I encounter was I do not like the texture the transfer paper leaves. I had lovely double satin ribbon and the laminated feeling is not a happy one.
Third issue was when i went to put in my label I realized not only did it need to be printed mirrored but also needed to be upside down. It's a small cosmetic glitch not big enough for me to go and print another label. the label points in what I'd consider the wrong direction. Being that you can still see and read it when the pocket is face up its close enough for me.
Cutting the iron on adhesive went smoothly. I used heat and bond ultra. Took a little bit to figure out how much to cut out of the middle, but I think I guesstimated right. I took apart a diaper box to make myself a iPad text dummy to make sure the fit would be snug but not tedious. Ironing went well. I highly recommend using a pressing sheet. Don't think the vinyl likes heat too much.

The adhesive should be strong enough to last awhile without fear of it coming off. However he's planing on a road trip up here this summer so I'll sew it down at that point. But I honestly think it should adhere just fine.
04 May 2010
iPad Backseat Entertainment Pocket
My dad has asked me to make him a pocket for his Airstream West to be able to use the iPad as backseat entertainment. He is so helpful with the process that he even included a pattern for what he wanted.
The pattern he provided is the Sprocket Pocket by Maya Designs. There is even a how-to video on youtube how easy is that!?
Being that all the information was provided it was rather simple. Okay minus the whole not having 14x17 paper to print the paper. I ended up having to look up the dimensions of an iPad and recreating the whole pattern from "scratch" my numbers and their numbers are exactly the same. I think it's a difference in seam allowance and borders. But overall its the same thing.
I forgot to pick up the iron on adhesive so the project is on stand by. Also the sewing machine is in the master bedroom. MacMac doesn't mind sleeping with lights on sewing machine humming (he can sleep through anything). However SqueekMoo has been sleeping with us in the master bedroom since MacMac has an awful work schedule for the next month. So not much late night crafting has been happening.

The pattern he provided is the Sprocket Pocket by Maya Designs. There is even a how-to video on youtube how easy is that!?
Being that all the information was provided it was rather simple. Okay minus the whole not having 14x17 paper to print the paper. I ended up having to look up the dimensions of an iPad and recreating the whole pattern from "scratch" my numbers and their numbers are exactly the same. I think it's a difference in seam allowance and borders. But overall its the same thing.
I forgot to pick up the iron on adhesive so the project is on stand by. Also the sewing machine is in the master bedroom. MacMac doesn't mind sleeping with lights on sewing machine humming (he can sleep through anything). However SqueekMoo has been sleeping with us in the master bedroom since MacMac has an awful work schedule for the next month. So not much late night crafting has been happening.
02 May 2010
Completed Jacket and Kilt
Yesterday I worked diligently on the jacket and coat. I finished sewing in the pleats of the kilt.

I then sewed the waistband on. The edge furthest from the interfacing was sewn right-side together to the kilt.

I then marked where I wanted the button holes. And went to work on the jacket.

I then marked where I wanted the button holes. And went to work on the jacket.
The jacket did not like me at all yesterday. I accidently cut the backside a little to wide of the main fabric, and fought it all day. In the end after Squeekmoo had gone to bed, I re-cut the plaid.
Everything then went smoothly from there. Especially once you remember the order to sew one's seams:
I sewed the sleeve cuffs, bottom edge and front edge/collar of the lining to its matching plaid (If you want a ribbon tie, don't forget to pin in place before you sew the front edge/collar). I then flipped the jacket inside out and top stitched the edges I just sewed. I then lining sides together sewed underarm seam, clip the curve, flipped inside out again. Now with right sides together I sewed the underarm seam again. And Voila the jacket is complete with lovely French seams.

We hit a time crunch. I went ahead and sewed the Velcro into place. Fuzzy side went on the front skirt apron, and hooks on the inner skirt apron. I didn't have time to put in the elastic, but since I plan to I did a very quick basting of the waistband so that I could undo it when I had more time and set the elastic. SqueekMoo liked his jacket, but was so unhappy when I put the kilt on him.


Instead I let him wear his jeans with the coat and the kilt stayed at home.


30 April 2010
Kilt and Jacket Progress
I undid all of last nights efforts. I forgot that I needed to work on the hem before I can pleat. I started by serging the bottom edge. I then folded the edge up by half an inch and ironed it in place.

I then made another fold three inches up. Pined and Ironed in place

I then sewed the hem in place. Using white thread I followed one of the white lines making sure I caught the smaller fold. One small glitch was that I sewed on the wrong side of the fabric, instead of the right side. Therefore my seam line is a bit more visible on the front than I would have hoped. But unless you stare right at it one would never know. I then measured up from the hem how long I wanted the kilt to be, and cut off the excess fabric.
I then started work on the waistband. Using the excess fabric I just cut I cut a strip 3 inches by length of fabric. I pressed each long edge up half an inch and also ironed down the middle. I then ironed a piece 1" wide fusible interfacing along one side:

Back to the kilt. I re-pined all my pleats.

Once pleated I folded the front skirts over to check how it laid. Perfect.

I then started sewing the pleats in place. Using black thread I sewed as close to the pleats edge as possible for about three inches and then reveres stitch for half and inch. I got about half way through with the pleats when I had to stop and tend to other things.
After I got SqueekMoo to bed I started drafting the pattern for the Jacket. I used the Kimono block from Winiefred Aldrich's Metric Pattern Cutting for Children's Wear and Babywear along with the sacque pattern from A Day In 1862 as starting points. With the help of one of SqueekMoo jackets I think the pattern I created might fit him. We'll give it a test run tomorrow.
along with the sacque pattern from A Day In 1862 as starting points. With the help of one of SqueekMoo jackets I think the pattern I created might fit him. We'll give it a test run tomorrow. 
29 April 2010
A Kilt for SqueekMoo
Today I began work on a kilt for SqueekMoo. I have been meaning to make him a kilt for quite some time, on the grounds that he is of Scottish decent. Hence the Mac part of our name.
I wrote a term paper on kilts , so to make use of my bit of knowledge I'll share some terminology. Tartan refers to the crisscross pattern of horizontal and vertical lines. To some this is known as plaid. In Scotland the original definition of plaid is blanket. The word kilt was originally a verb meaning to draw up around oneself. So a kilted tartan plain was a crisscrossed patterned blanket pulled around oneself. Confused? Good because I was when I was doing the research since everyone likes to interchange the words.
Now the biggest reason why I put off making Squeekmoo a kilt is that clan tartan is just so terribly expensive. A yard alone can easily go for more than a hundred dollars, since it is generally custom woven wool. I have run across 100% cotton tartan for about thirty dollars a yard. But toss in the fact the little guy is always growing, it's rather costly.
What sparked today's' endeavors? This weekend the local park is having a civil war enactment. MacMac has to work this weekend so it's just me and the little dude. I've decided that we are going and I’m dressing him up. I have the perfect little coat planned out in my head. And I decided that a matching kilt would look dashing.
Being that I have but two days to pull this off, I fully expect it wont get done in time. But I shall try my best.
I had it all planed out on how I was going to make his little kilt be adjustable so my efforts wont get outgrown as fast as a non-adjustable one. A generous hem will be necessary to accommodate change in height. Velcro in the front since buttons, hook and eyes, or snaps would limit horizontal growth. And buttonhole elastic in the back, though pleated I think to gather it up some while he is small will give the kilt a few more months of use than making the pleats fit his hind side perfectly now.
However after going to three different craft supply stores today, I learned that buttonhole elastic is no long sold in brick and mortar stores. One of my favorite on-line supplies stocks it, but I wouldn't be able to get it in time. So back to the drawing board.
The fabric is from my stock pile. Long ago, when I first got into sewing, I kid myself into think I could make a civil war gown. I didn't get further than assembling the materials since I realized just how in over my head I was. I had picked out a solid blue cotton for the gown, but for the lining I decided to have some fun and went with a tartan. The blue in the tartan matched the blue of the cotton so it was perfect. Now I'm using the tartan was the main fabric and the blue cotton as my lining.
The fabric went through the wash this morning. Once SqueekMoo was put to bed I went to work on pleating.
I cut a piece of fabric twenty five inches by width. The twenty five inches provided plenty of length. The width was a bit problematic. The back side of a kilt is normally pleated one of two ways. Pleat to line means that you pleat on the same line of every repeat. I personally prefer pleat to sett however it’s a newer notion and requires a great deal more fabric.
I tried pleating to sett first, but came up four inches short of what I wanted the finished pleated width to be. I played with various pleating to line. I think I tried four variations before I settles with the pleats I ended up with. One of the things I don't like about pleating to line is that a single color can dominate the pleats. I didn't want it to end up all black nor did I want it to end up all blue. The end result is the repeat is about 1 inch wide. Half an inch of the repeat is shown, the last half inch is tucked in a fold. I did the repeat so it starts halfway through the blue and ends halfway though the black, so I have half sized stripes of black and blue. See the picture below I'm sure it says more than I can describe.

All in all the pleating took about an hour. Tomorrow shall start off with ironing and we'll see how far we get.
Subscribe to:
Posts (Atom)