Showing posts with label Play Date Bags. Show all posts

27 June 2010

Playdate Bag is done!

MacMac took Squeekmoo out for a few hours this afternoon and I was able to making and sew the lining for the Play date bag. I'm going to have to change its name to Trip to Grandma or something like that because the bag is HUGE!

Here the completed pictures though:

Front

Back

Inside Out Front

Inside Out Back

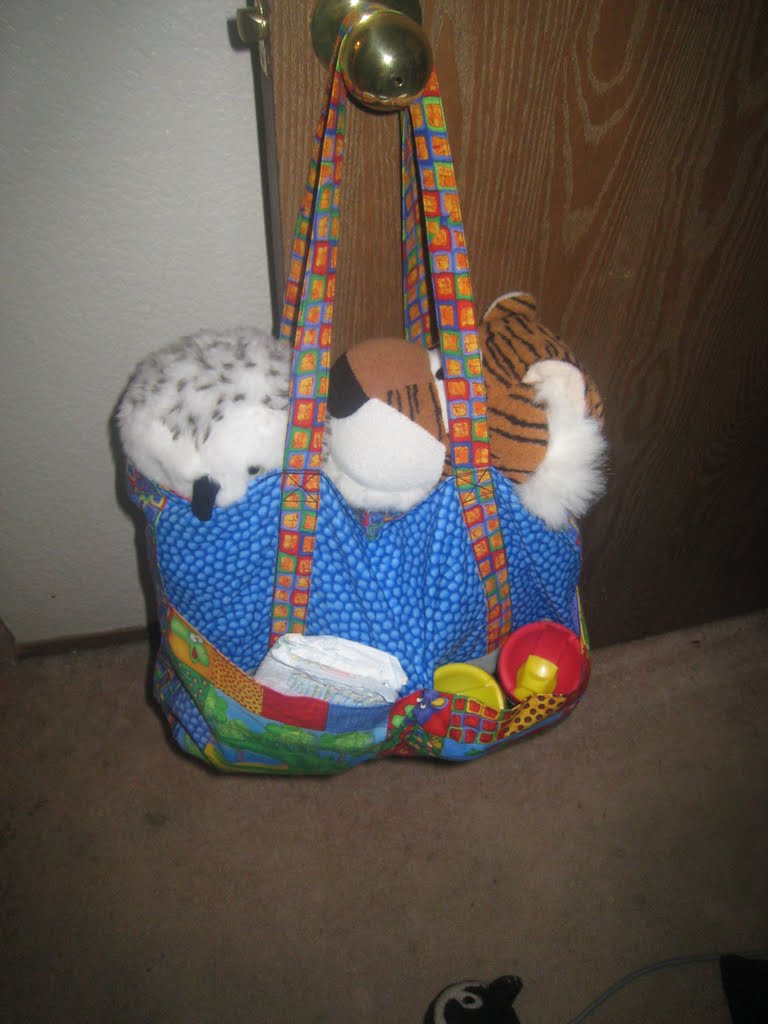
A peek from above

Fully loaded: Two sippy cups, diapers and wipes in the front pockets. Board books and Geotrax trains in the back pockets. Change of clothes, Hobbes the Tiger and Who the Owl in the main compartment.

22 June 2010

What's on the Project table this week

I'm in the middle of so many projects! Thankfully all of them are destine to be complete... I hope.

Doll for SqueekMoo. I started version one back in December. I made the doll and stuffed it, however the attempt to give her wig hair failed. So she was put on hold for some time. Recently Squeekmoo showed some interest in yarn hair as a substitute for mommy hair, so I quickly gave the version on yarn hair. Well MacMac has called it Cher one to many times and so I'm working on version two. Version on was a well endowed historical-ish cloth doll to dress up in historical garb. Version two is actually meant for to be a child's play thing. At this time I'm currently in the middle of stuffing her. After that its sew her head on, give her hair, and give her clothes and hopefully SqueekMoo will dote on her hair instead of mine at bed time.

Play Date Bag. Have to cut out lining and sew it all together. I have decided a little velco will be in order. I'm continplating velco and a zipper for the next version but we shall see.

Stillborn gown. I guess I get in the mood to make these during certain holidays. In these case Father's Day just went by and we reflected on Matthew in our personal ways. Anyways it got me in the mood to work on them. Reminded me I need to do more prep work so that when the mood strikes I don't have to waste time getting to the good part. I had to undo all the stitches of the last one I made, but I only have row to stitch of the current one. I hope to get a couple done this month.

I'm also going to start a photo word book for SqueekMoo. Basically get some pictures of some words he knows, and words we hope he'll learn. Write the words in nice capital letters and stick the pictures in a photo album. If these works I'll probably make him a Photo Alphabet book as well. Key thing I'm hoping out of the first photo book is we are going to visit form relatives and I think it would be wonderful if SqueekMoo could already identify them.

And that's what's on the project table...

17 June 2010

Outer Shell Done

please forgive any typos, Mr T has decided to fall sleep on my lap after I started typing on the laptop. My left hand is free but my right arm is trapped under his forehead.

As the previous post I was able to make some head way with the bag again once I recalled how to tame slippery fabric. I'll not be able to work on the lining sine I haven't any paper big enough to cut the nylon pieces.

Here are the lovely peices I cut from my tutorial. Along with the pocket I finished earlier, the handles (those were a pain, I'll have to remember to do them my preferred way instead of the economical), and the peice the nylon will be sewn to:

Sew the handles to the blue fabric. French seam the flue to the nylon.

Baste the outside pocket in place and sew a center seam and hold it up so you can peek inside the very gererous pockets

Sew the side/bottom pieces with french seams

And vola your done.


So that turned out bigger than I thought it would be. The handles can hang off a standard free with purchase umbrella stroller Would not recommend hanging a fully loaded version of the Play Date bag off a stroller like this. Can probably get two sippy cups into one of the pockets, wipes and diapers into another. The leaves two more pockets plus the main compartment for toys. Not Bad.

How to not go crazy sewing nylon.

I figured out a way to combat the slipperiness of nylon. I think this method will also work with other slippery fabrics like satin and chiffon.

You will need your pattern, your slippery fabric, paper to go under your fabric and paper to go over your fabric.

Ideally I would have preferred to have craft paper or newspaper paper with no ink on it, but I used what I had on hand. I'll probably go to IKEA this weekend and get the paper for the child easel.


For now you can see my example of using yesterday's junk mail.

First trace your pattern on to the peice of paper that will go on top of the slippery fabric:


Next place the bottom paper down and then put the slippery paper on top of it:

Then place the piece of paper with the pattern marked out on top. Put something of weight on top to prevent any sliping around and pin the three layers together.


If it's a forgivable fabric like silk chiffon pin anywhere and everywhere. If' it's not forgivable like the nylon is pin only in the seam allowance.

The scissors in the picture are my "I don' care scissors." I cut fabric, paper, sometime tape. Scissors have feet in this house so i'm lucky to know where any are. My  good fabric scissors have a happy home, but they are five years old and could use a sharpening. I like the scissors from IKEA and during back to school season you can get some for cheap.

I wont guarantee this method is 100 percent fool proof, bu it will prevent that the pattern you cut out of the material to be closer inn size/shape then if you didn't use the paper. With just the pattern and fabric it slips every which way distorting the finished piece. Good luck!

15 June 2010

A good stoping point

Today I started work on what I shall call The Play Date bag. Basically I've got lots a fair amount of leftovers from SqueekMoo's Quilt that I need to make something out of it. They aren't big pieces so I'll have to be creative with what I have versus what I have.

MacMac's only comment on the whole thing was that whatever I make the lining out of let it be something that liquids and be wipes off and not soak into. So I opted for some Nylon.... I am cursing him inwardly for the choice. The stuff is so slippery, I'm having a hard time cutting my pieces out. If it weren't for the darn corner curves I could make due with the rotary cutter, but alas not wanting a boxy bag I must contemplate how to work around my choice of material.

I did get the nice big gererous pockets finished today though.

 Side that will be seen.

A look at the backside of one. Wont really see it unless you are looking directly into the pocket.


Overall though its a simple bag with a nice handle. And these flaps sewn on the front and back to form pockets. I think I'll have the pockets. So that two sippy cups will fit in them. hmmms if I had thought about it I should have sew some velco in so that I could make it so things couldn't slip out... oh well perhaps on the next one I'll give it a try.